Multiple Timelines revisited
By blurg64
At the Project Conference I was chatting to someone who was convinced that it wasn’t possible to have different tasks highlighted on different timelines in the Project client, so I thought I would post this walk through to confirm how it can be done.
To start, we need to create another timeline. I covered this a while back in this blog post, but for the sake of completeness will go through it again.
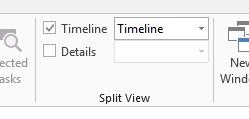
In Project, click on the View Tab and find the Timeline group.

Click on the drop down and choose More Views…

In the dialog, select the Timeline view and then click on Copy

Give the new timeline the name ‘Executive Timeline’ and click on OK

Now all we need to do is choose the timeline we want to start adding tasks to. In this case I have chosen the Executive Timeline

and have gone through and added the first three phases and coloured them as per below.

Next change the timeline to the normal timeline, notice it’s empty to start with and hasn’t carried over the tasks added to the previous executive timeline.

You’re now free to start adding different tasks to this secondary timeline quite independently of the the Executive timeline we created before.

Now there are some things you need to consider if you are using multiple timelines:
- Make sure you have the timeline you wish to add the tasks to visible before adding
- If you’re Synching the Project Schedule with a SharePoint Task List, then only the default out of the box timeline appears to be picked up.